Labels and epics are useful tools for sorting and locating stories and larger projects in Tracker. Read on to see how you can slice, dice, and julienne your stories to make them easier to sort.
Labels are simply tags that you can associate to stories in Tracker to classify them. For example, you can label the stories that are part of a given release with a tag to show that release, or tag stories that need design work added, or need testing, etc. We suggest creating a standard set of labels that your team can use consistently, because too many labels can be overwhelming when you’re trying to find the one you want. In addition, inconsistently applied labels means that you might be missing stories when you view everything that has a given label.
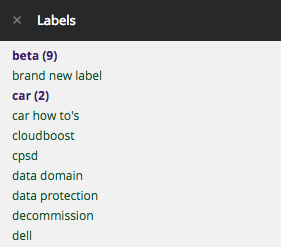
Here are several labels that we use and recommend:
If you’ve found other labels that have been useful with your teams, please share in the comments section!
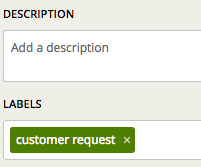
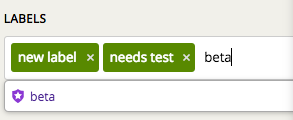
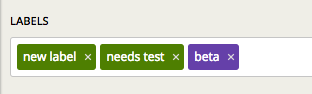
Creating labels is easy! There is a Labels field under the description in an expanded story. To create the label, just type in the name of the new label you want (assuming you’re creating a new label for the first time). Then, hit Enter to create the label:
If you want to add an existing label, start typing and Tracker will show you all labels that match what you’ve entered:
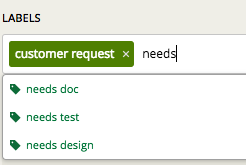
Click on the one you want, or type the full label name and click Enter:
You can also add labels to stories in bulk by checkmarking all the stories you want to tag in any panel:
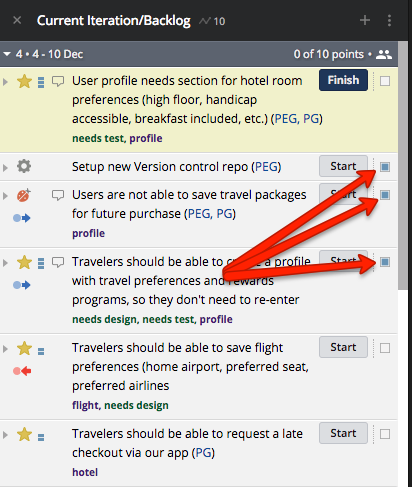
As soon as you start selecting stories, your Tracker header changes to give you bulk update options, one of which is Label:

Click the Label dropdown and select the label you want, and it will be applied to all selected stories. That’s all there is to it! (Please see Selecting multiple stories in Tracker Help for more details.)
Now that you have appropriately labeled your stories as needed, you can view all stories with a given label by clicking on that label from any story panel. (As a reminder, labels are green, and epics are purple; we’ll cover epics in just a minute.)
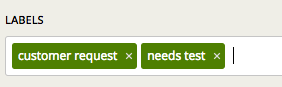
Clicking on the needs test label below…

…will open a search panel with all the stories that have that label applied.

Another way to find all stories with a label is to click on the Labels menu option on your sidebar:
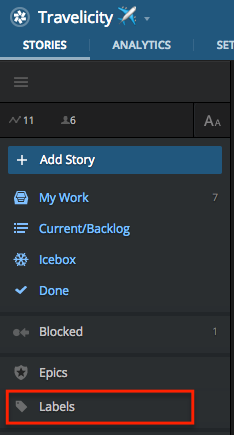
This will bring up a panel showing all your labels:
From there, you can simply click on the label you want to get to the same search panel as shown previously, for needs test.
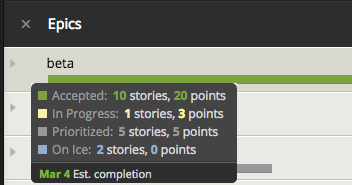
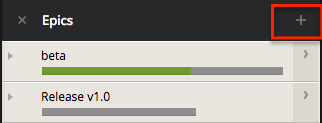
Tracker Epics represent large features and themes that are made up of multiple stories. (Please see Tracking big features and themes with epics in the Tracker Help Center to learn more.) The Epics panel lets you organize and prioritize your epics independently of how the stories under it are prioritized. Mousing over an epic shows you a progress bar to get a bird’s-eye view of this feature and makes it easy to determine the status of your epic:
Click the + sign in the upper right corner of the Epics panel to create a new epic:
You can also convert a label to an epic if you decide you want to promote it. To do this, open the Labels panel from your sidebar, find the label you want to promote, click the gear icon on the right, and select Convert to Epic from the drop-down menu:

Once you have your epics created, you can add them to your stories in the same way you add a labels—via the Labels field. Type in the name of the epic you want
and click Enter
Note: You can also add stories to an epic by dragging and dropping stories from the Icebox panel or Current Iteration/Backlog panel. This works with bulk select of stories as well!
As you might expect, viewing epics works in much the same way as for labels: you can click on an epic label in a story panel or expanded story view to open a new panel showing all the stories with that epic:
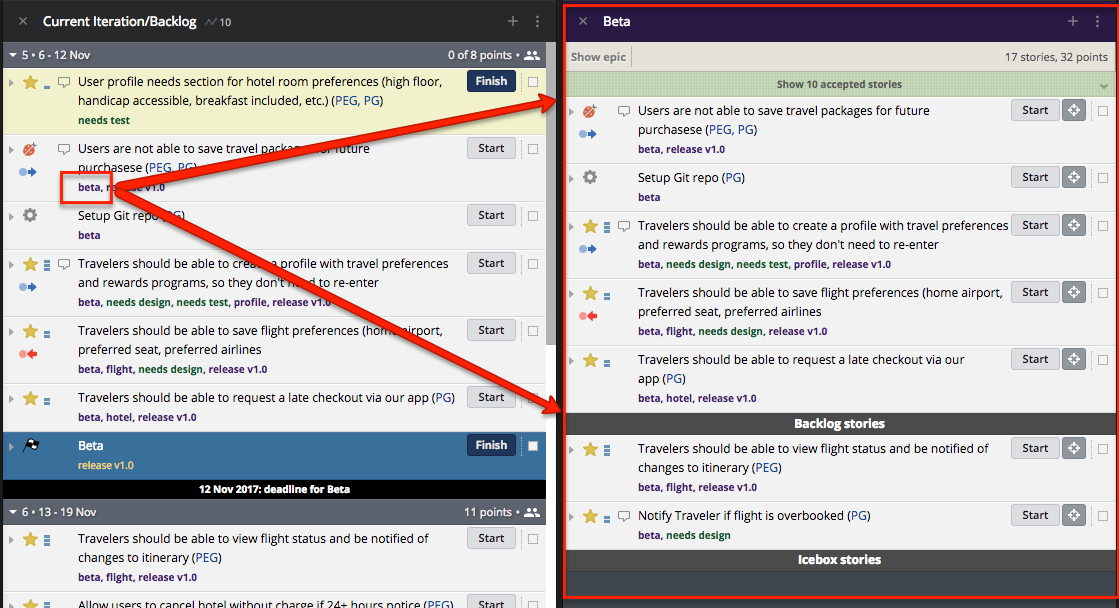
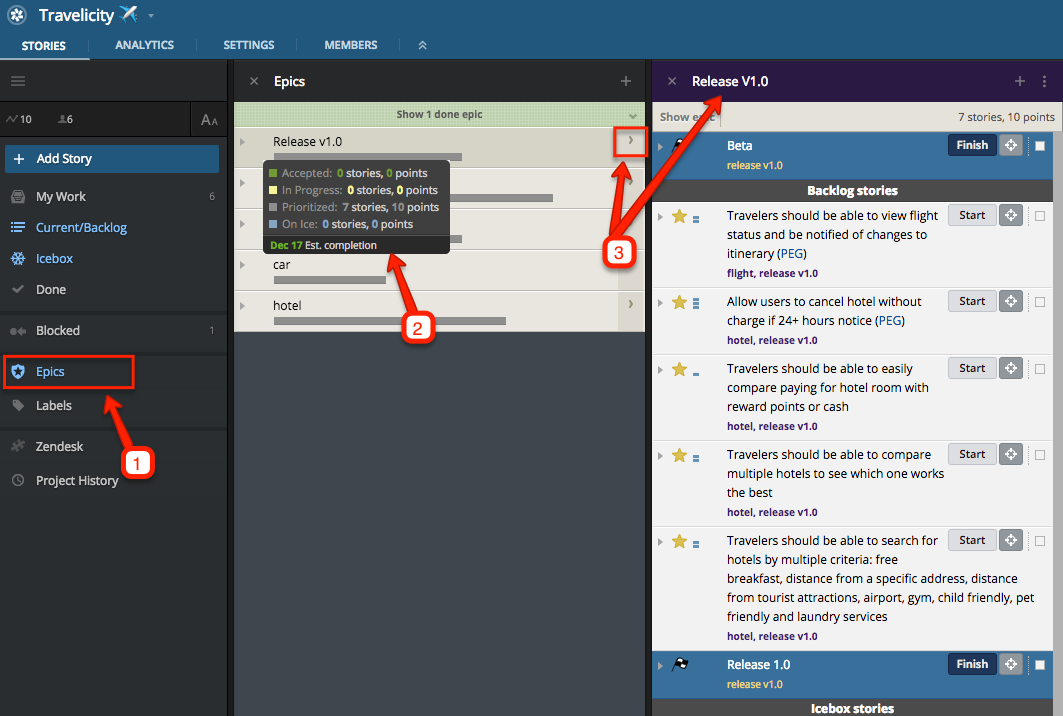
You can also click on epics in your Tracker sidebar (1) to bring up the Epics panel listing all your epics, and either mouse over an epic for the quick summary view (2) or, if you click the arrow on the right side (3) of an epic, it will also open the list of all stories that are in that epic.
Hopefully this has given you some useful information and tips on using labels and epics to categorize your stories and make organizing and finding what you need faster and easier. We can’t promise it’ll make you the Martha Stewart of organizing Tracker stories, but it’s still a good thing! Please let us know what we’ve missed or what else you’d like to see in the Discovering Tracker series by using the Provide Feedback widget under Help in any project, contacting us on Twitter, or emailing us.
Category: Productivity
Tags: How to Discovering Tracker