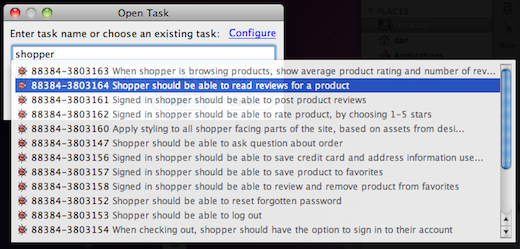
We’re big fans of the RubyMine Rails IDE, and are excited to see that JetBrains has added Pivotal Tracker integration in the latest EAP update.
The integration lets you easily pick a Tracker story from within RubyMine and create a task out of it. RubyMine tasks let you organize your work into different contexts. You can switch between tasks, and create source control changes based on them.
To use it, you’ll need a Tracker API token. Go to your My Profile page to get that.
Next, in RubyMine, go to Settings, and add a Pivotal Tracker task server (under Tasks/Servers). Use http://www.pivotaltracker.com_ for the URL, and enter your API token and Tracker project ID.
Note: This version of RubyMine sometimes hangs when trying to add a task server through the settings UI. As a workaround, you can edit the workspace.xml file, located in the .idea directory under your Rails root. Add the following under the element:
<servers>
  <PivotalTracker shared="false" url="http://www.pivotaltracker.com">
    <option name="APIKey" value="YOUR_API_TOKEN" />
    <password />
    <option name="projectId" value="YOUR_PROJECT_ID" />
    <option name="useHttpAuthentication" value="false" />
    <option name="useProxy" value="false" />
    <username />
  </PivotalTracker>
</servers>
Once the task server is configured, you can use the Switch to Task dropdown in the RubyMine tool bar to add a new task based on story in your Tracker project, or change between existing tasks.

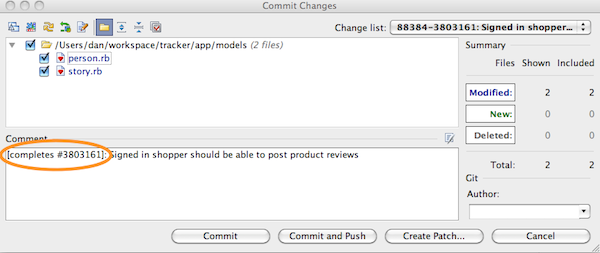
You can optionally create a source control change based on the task, allowing you to preserve the story context all the way through to the commit.

If you’ve using Tracker’s post commit hook to automatically link commits to your stories, you can reformat the change description to match what Tracker expects (e.g. [completes #123456]) before you commit the change.
