
Accounts in Pivotal Tracker are used for project organization and administration delegation. They are also what paid subscription plans are associated with.
In this article, I’d like to explain what accounts are, and talk about how you can consolidate existing Tracker projects across your company into a single account.
First, what exactly is an account in Tracker, as opposed to a user (or login)? From our FAQ:
“A user is a person with an email address, password, and an optional username. Projects belong to accounts rather than to users, and users may own one or more accounts. Accounts provide a way to group your projects. For example, you might create an account for your company projects, and a separate one for your personal work. Accounts are separate for billing purposes, and also allow you to share administration responsibilities by designating other users as administrators.”
More about accounts here.
When you sign up for Tracker, an account is created for you automatically. If you join by accepting an invitation to someone else’s project, though, your first account isn’t actually created until the moment you create your first project.

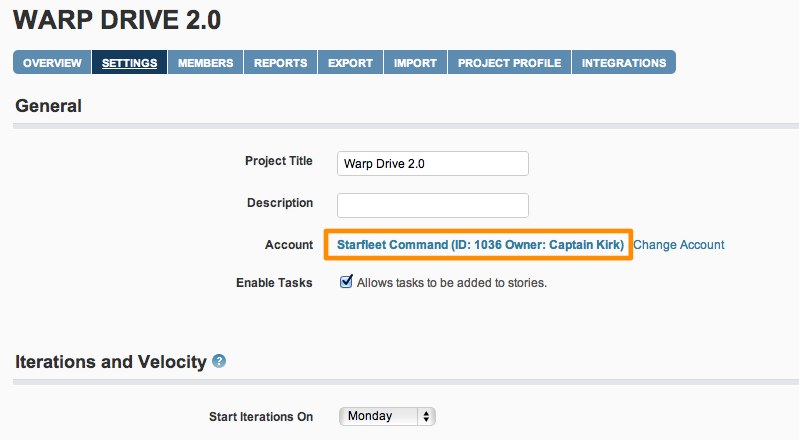
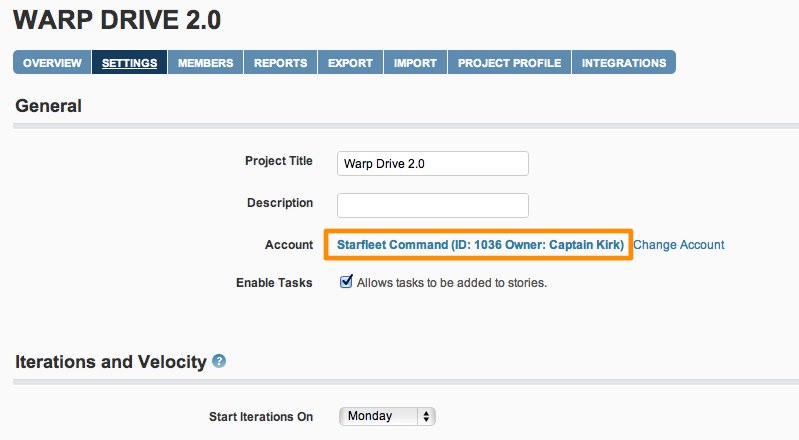
All Tracker projects belong to an account. You can see which account a given project belongs to by going to that project’s Settings page (Project > Edit Project Settings). If you’re the owner of the project, you can change the project’s account to any other account which you own, administer, or have project creation permission in (more on that later).
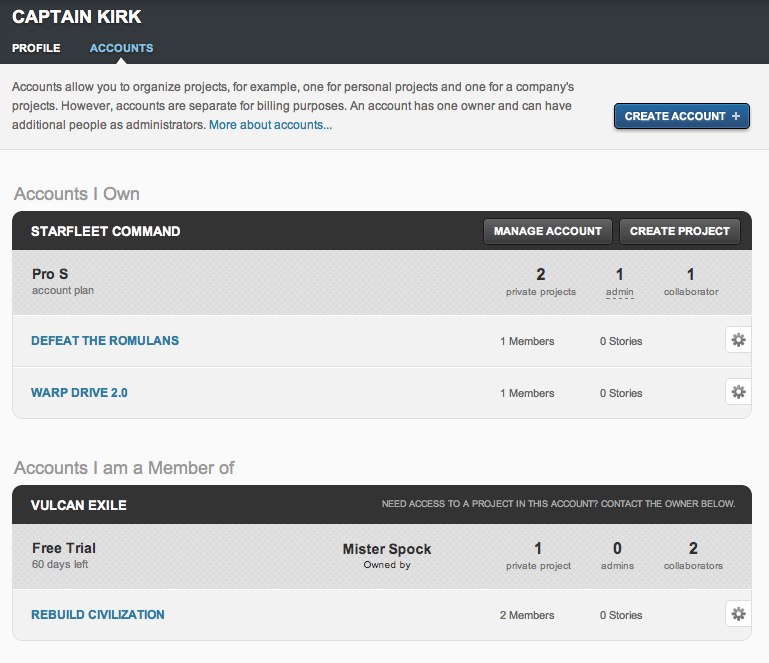
You can see the account or accounts that you own, administer, or a member of on the Accounts page, which you can get to via the drop-down menu under your name, in the top right corner of every page in Tracker.

You can create as many accounts as you would like, for example to separate your personal projects from your work projects, by clicking the Create Account link at the top of the Accounts page.
Each account is independent in terms of what plan it’s on, and for billing purposes. If you have two accounts, for example, you may leave one on the free plan, for your personal projects, and purchase a paid plan which allows collaborators for the second account, which you might use for work projects with your team at your company.
You may find that the Tracker projects at your company belong to a number of accounts, owned by different people. Here is how you can consolidate all of the projects into a single account, in order to centralize administration and so that you can have a single paid subscription for the entire company.
Ether choose an existing account, to serve as the main company account, or create a new one by clicking Create Account button at the top of the Accounts page, and naming the new account after your company, for example. The user who creates the account is the account’s owner by default, but you can change that later.

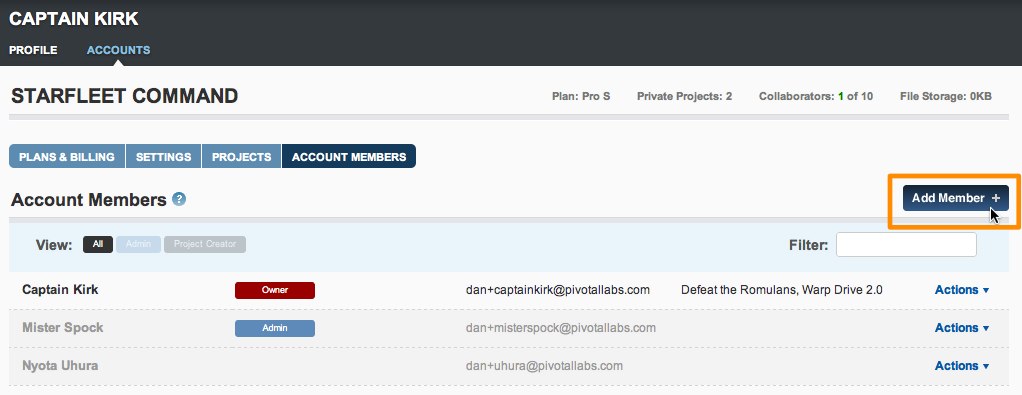
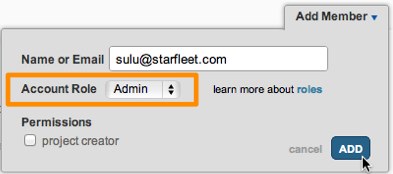
Identify all of the people in your company, if any, who should have administrative access to the account and all of the projects in it (for example to add/remove project members). Go to the Members page for the account, and for each of these people, click the Add Member button, and change the role in the popup window to admin. You can specify existing Tracker users here, using their email address, or add new users, who will receive an email invitation.
Account admins can manage members and project settings for all projects in the account. They also have the right to change people’s roles, meaning they can add additional admins, and they can also transfer the ownership of the account to themselves, or any other admin. Admins should be trusted people within your organization.
Read more about the various account roles here.
Identify all of the people, beyond the list of ‘administrators’ from step 2, who are either existing owners of projects within your company, or who you would like to give the right to create projects in this account. Again, on the account Members page, use the Add Member button, and check the project creator checkbox.
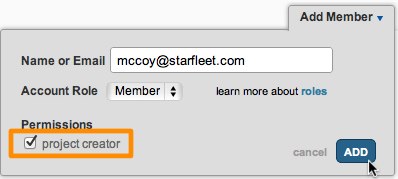
At this point, all of the admins and project creators (from steps two and three, above) will be able to move their projects to this new company account. They can do that by going to the Settings page of their project (Project -> Edit Project Settings), and clicking the Change Account link on that page.

They should see the new account in the drop-down list – if they do not, that means they have not been given either the admin role or the project creator permission for the account. You can verify that by looking for them on the account Members page.
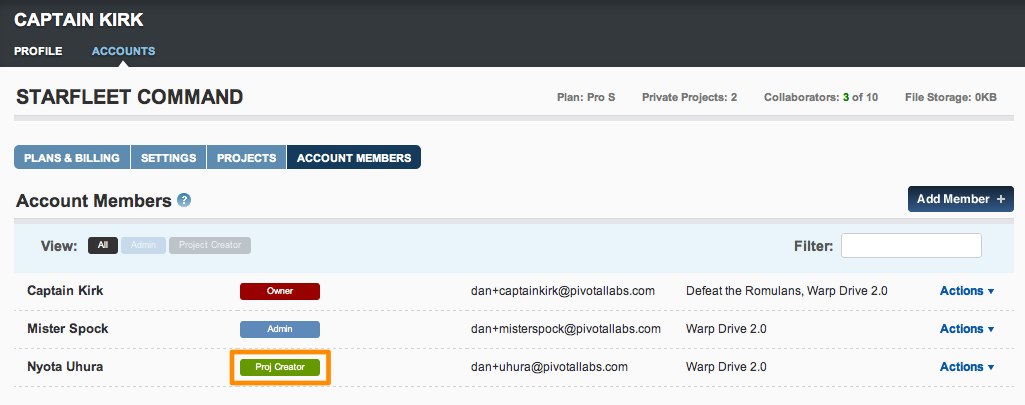
An alternative to adding all project owners as “admins” or “project creators” on the account, and asking them to move their project, is to have them add you (the account owner) as a project owner. Once you’re an owner of a project, you can move it to your account yourself (in Project Settings).
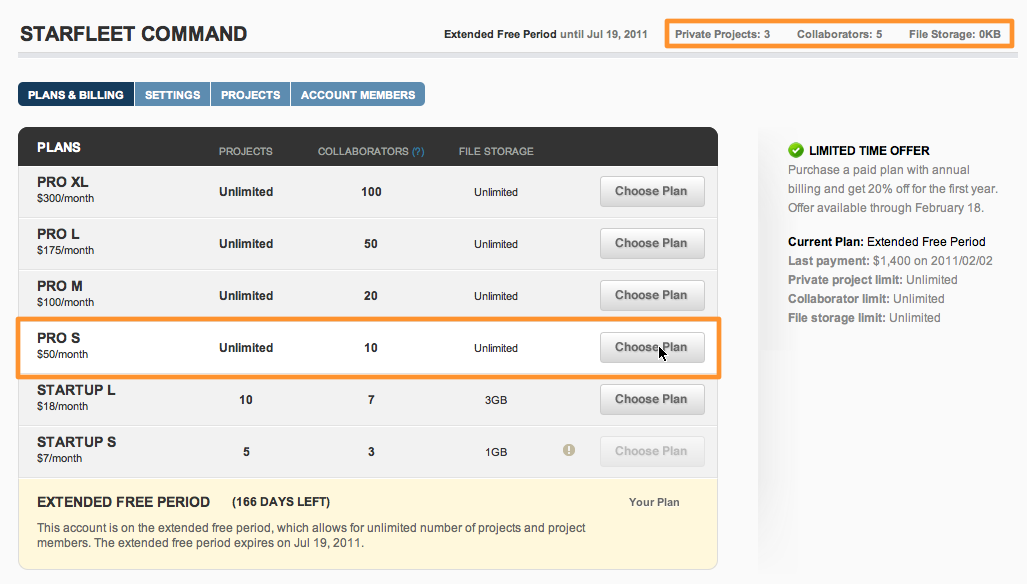
At this point, all of the Tracker projects within your company should be in the new account, and they should be listed on the account Projects page. At the top, you should see the total # of private projects for the account, as well as the total number of read/write collaborators, and the amount of file storage in use.

The account Plans & Billing page will allow you to choose a plan that’s most appropriate, given the number of private projects and collaborators in your account, as well as your file storage needs.
Only the account owner can enter credit card information and change what plan the account is on, but any of the account administrators can take over ownership of the account, on the account Members page (via the Actions menu to the right of the person you’d like to change ownership to).
Note: You do not need a paid account (or an account at all) in order to be a member of someone else’s project(s). Accounts are only required to create private projects, and paid accounts are only required to invite collaborators to your private projects. Public projects are free, and allow for an unlimited number of collaborators.
Category: Productivity