
Did you know that you can clone your stories and panels in Tracker to make getting things done faster and easier? Or that you can export/import project data via CSV to essentially clone an entire Tracker project? If this is news to you, then we have just the thing: Welcome to Discovering Tracker, a new series that will spotlight various features in Tracker to help you get the most out of using it.
Please read on to learn more about a few valuable shortcuts that can save you time and help you quickly reuse stories and tasks in your Tracker projects.
Cloning stories can be useful for a variety of scenarios:
There are a couple of ways to clone stories. One option is to clone a story using the Clone button on any expanded story. Once cloned, your new story will appear at the top of the Icebox.
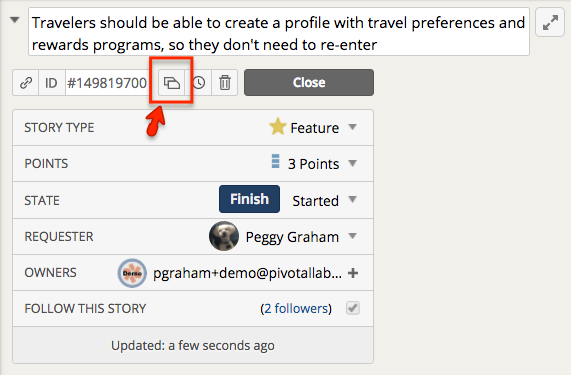
Using the Clone button to clone a story.
If you want to clone multiple stories at once, simply select the stories you’d like to clone by checking the box to the right of each story.
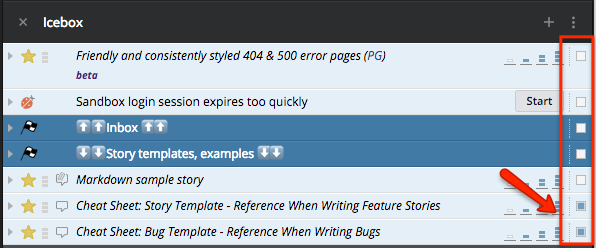
Cloning multiple stories at once.
As soon as you select one or more stories, you’ll see the heading at the top of Tracker change to provide you with several bulk-editing options, one of which is Clone.

The Clone bulk-editing option.
Click the Clone button and you’re done—you can now go forth and edit the title and details of your newly copied stories! Hurrah! For more detail on the other bulk-editing options, check out this article in our Help Center.
You can also clone most story panels in Tracker, which is a very convenient way to reorder stories by quickly dragging them from the original panel to a cloned view of the very same panel, meaning no scrolling up and down and possibly losing your place. To do this, just click the Story Actions menu (the three vertical dots in the upper right corner of the panel you want to clone) and then click Clone panel in the drop-down menu.
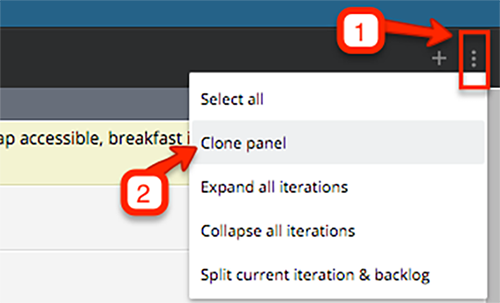
The Clone panel option in the Story Actions menu.
With these two identical panels open side-by-side, you can now easily drag stories from one section of the backlog to another.
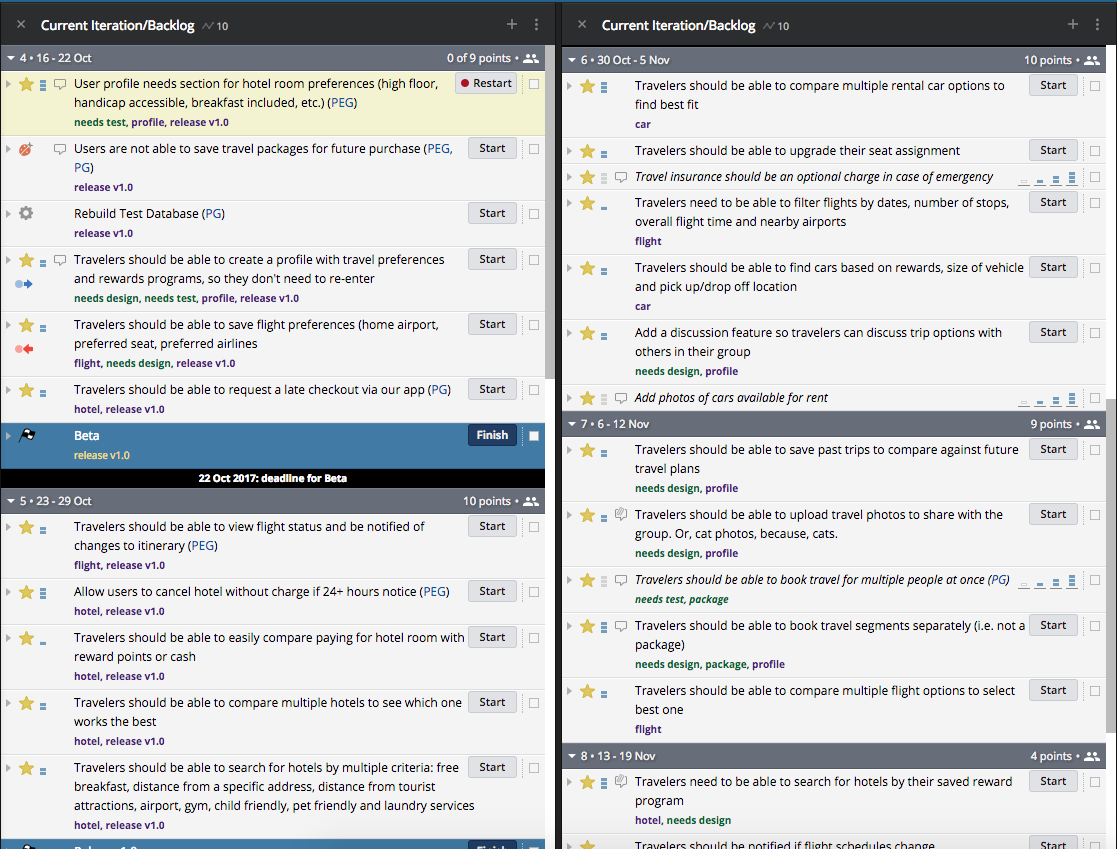
Cloned panels shown side-by-side.
This method definitely makes it easier to reorder stories because you won’t lose your place: one column can be positioned where you are moving your stories from, and the other on the new location where you want your stories moved to.
Within your Tracker project settings are two useful options for importing and exporting CSV files.
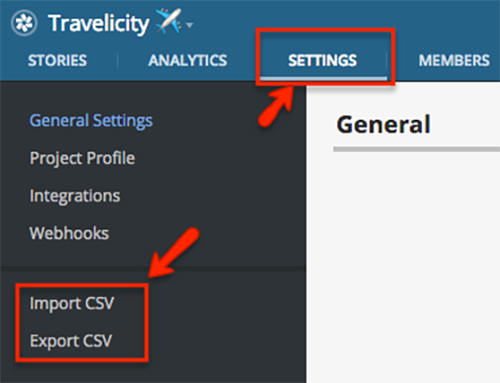
Tracker has Import CSV and Export CSV options.
With this option, once you export stories (and perform a small bit of data manipulation), you can import that file into a brand new Tracker project! This newly cloned project might be useful as a sandbox for testing a new integration or to jumpstart a new project.
Once your stories are exported, you’ll want to remove the Tracker ID column from your CSV file; otherwise Tracker will assume your import is to update your existing stories, rather than create new ones. Next—because Tracker has a maximum of 3,000 stories that can be imported at once—you’ll need to break up your file into smaller files if it’s larger than 3,000 stories and import each file individually. Lastly, if you have any integrations set up with your Tracker project, you’ll need to either set up those same integrations in the new project as well, or remove the integration columns from the CSV, too. For more information on this process, please see this article in the Help Center.
You’re now ready to import the CSV file(s) into your new project and bask in your multiplicity!
Tracker tasks are simple checklist items within a story to help you make sure you’ve dotted those i’s and crossed those t’s. You can paste a list of tasks into Tracker all at once and Tracker will create them as separate tasks, one per line. For example, let’s say you wanted to add the following tasks to a story:
This entire list of tasks can be pasted into the first empty task of a story all at once, providing you with four new tasks.
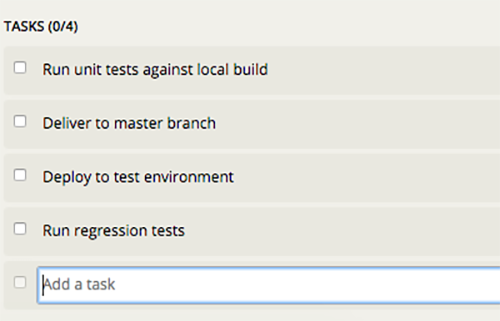
Using task templates.
They were all added as individual tasks with a single copy and paste! Ta-da! If you find yourself using the same task list over and over, you can save those tasks as a text file for easy reuse, or save a story that has those tasks in it as a template, and then clone the story every time you want a new story with those tasks.
Hopefully, this has given you some great ways that you can easily reuse your existing assets in Tracker to save you some steps in your future iterations. Enjoy! And if you’re running into any issues using the cloning or task templates functionality, have any questions, or have any suggestions for topics for us to highlight in Discovering Tracker, we’d love to hear them: you can get in touch via the Provide Feedback widget under Help in any project, contact us on Twitter, or email us.
Note: No sheep or robots—cloned or otherwise—were harmed in the writing of this blog post.
Category: Productivity
Tags: How to Discovering Tracker